Honda CRF250L - Big Bore
October 18, 2013 version
|
Big Bore |
|
|
Honda CRF250L - Big Bore
|
Click pictures to supersize.
|
When I was modifying my CRF250L, I noticed that as the performance improved, it was always lacking when compared to my WR250R. There is no other way to say it - the WRR engine has more low-end torque than the CRFL, stock or otherwise. So when Bill Blue announced that he was developing several CRFL big-bore kits, I was very interested. A big-bore kit was all the CRFL needed to finally get the low-end torque it was lacking. When I saw the dyno chart, I was sure of it. Here's the first install of the big bore piston on the test mule.
Bill and I stayed in touch while he was developing the 283 kit and once it was ready, I ordered it. Although Bill is also developing a larger-bore kit, I wanted the smaller displacement kit to start with. I'm concerned about vibration, and wanted to see if the 283 kit kept the engine as smooth as stock. I've found that larger big-bore kits sometimes introduce engine vibration. Call B&B Cycle Restoration at 316-640-3629 for price and availability. |
|
A uniformed federal employee delivered a box to me today (USPS). Bill sent me the first B&B CRF250L 283 big bore kit. The 283 kit is about 34cc bigger than stock, or about 13.6% bigger.
The spigot end. The spigot wall thickness is about 3 mm. --->
Rings, pin, and clips. Note that there is a top ring, a 2nd ring, and an oil ring set just like the stock CRFL. --->
|
|
Spark plug tip looks fine. I don't like the dirty threads...
It took an hour to get the head and throttle body off. As I raised the head off of the mounting studs, the front of the head eventually contacted the front frame downtube. At this point I had to get the throttle body out of the way so the head could be titled back ever so slightly to clear the frame. I eventually got the throttle body out and then the head came out with some careful tilting and jiggling. What I should have done was remove the front and rear metal retaining bands on the throttle body, not just loosen them. DUH. Almost forgot, I had to remove the upper right exhaust stud (double-nut it) and the radiator - it's very tight getting the head off.
While I was inspecting the head, I found this small rolled up shaving lodged in front of the machined surface for the right-front stud nut/washer. If you look closely at that area in the picture on the left, you can just barely see it. Click the picture to supersize it. Using FireFox on a Mac, you can zoom in the screen by holding down the CONTROL key and roll the scroll wheel on the mouse. It's aluminum, so a magnet didn't help getting it out. I used a curved pick. I'm glad I found it! |
|
There's been no activity for over a week; I'm dead in the water. While I was installing the piston pin clips, I had a slight problem. I mounted one clip with the piston on my work table. After installing the piston on the rod and sliding the pin home, I attempted to install the 2nd clip. I fought with it for 30 minutes before giving up. I removed the pin and piston and went back to the work table to have a look. The Wiseco clips are very heavy duty and they don't bend very easily. I practiced several techniques for installing the 2nd clip before deciding on one to use. Before I got to it, I had one last look at the clip. I tried to pinch it between my small needle-nose pliers to see how stiff it was. All of a sudden it took off, bouncing around the garage. I heard it ricochet three times before stopping with a 'plink' amidst all the boxes of parts stacked on and under my workbench. I had a look for 20 minutes, then gave up. The next day I called Wiseco and told them my problem. They promised to send a new set out via snail-mail. That was 6 days ago. A follow-up call yesterday resulted in their assurance that the clips were 'in the mail'. I suspect that the severe weather here and in the midwest has slowed the mail a few days, and I'll probably see the clips early next week. I hope.
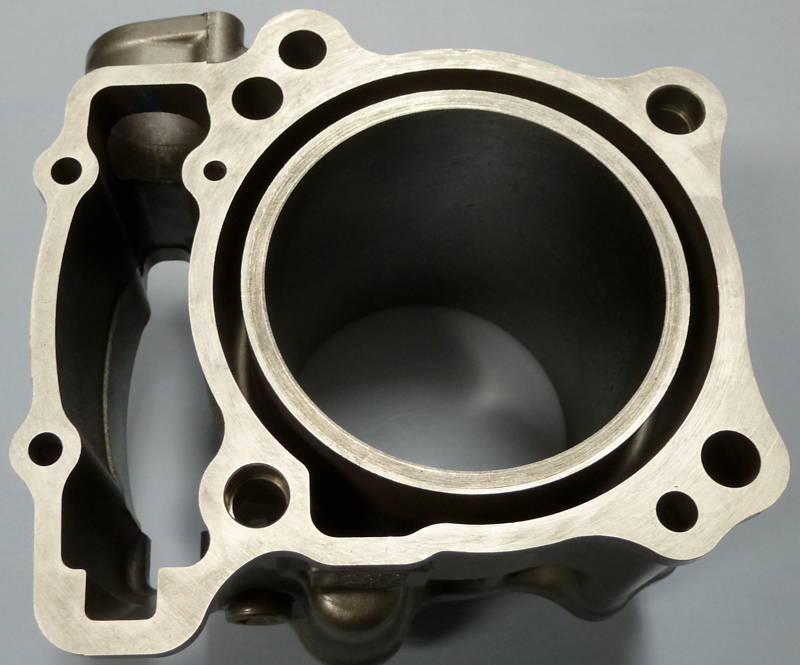
Cylinder installed.
I installed the head without the throttle body and rubber connector. Even with the throttle body out of the way, it was difficult sliding the head onto the mounting studs while keeping track of the cam chain and getting the plastic chain tensioner in place. Now the hard part. I removed the mud flap and the two upper subframe nuts/bolts and two lower subframe bolts. I pulled the white plastic wire bundle retainer out of the frame hole near the upper left subframe mount. It broke, but not a problem. I slid the subframe back one inch or so. I removed the rubber connector from the front of the throttle body, leaving the wide metal band on the connector loosely. I removed the metal retaining band from the front of the airbox boot. I slid the throttle body into the front of the airbox boot and pushed the throttle body into the air box boot, collapsing the boot slightly. Then I slid the rubber connector between the head intake port and the throttle body, sliding it onto the head intake port as I did so. Finally, I let the throttle body slide partly into the back of the rubber connector. I slid the subframe back into place, coaxing the throttle body all the way into the rubber connector. Then I threaded the subframe bolts loosely into their respective holes and loosely fitted the upper nuts. It was tedious putting the airbox metal retaining band back on. I had to open it wide, then collapse it as I fed it around the front of the airbox boot, then install the screw loosely. Next I aligned the rubber connector then tightened both metal bands making sure that each joint was fully aligned and tight, front-to-back. Lastly, I tightened the subframe bolts, zip-tied the wire bundle, and installed the mud flap.
Pick up a nut with the magnet, dip it in the oil, place the washer on the end and dip lightly once more.
BTW, Honda updated the Service Manual in November, 2012 and changed the torque on the stud nuts from 38 to 33 lb-ft. I knew those nuts were on too tight!
Cylinder head cover installed and all connections re-connected. Just have to tidy up a few things before putting the exhaust, fuel tank, shrouds, and seat back on. Should have a ride report late tomorrow.
I did a couple of heat cycles and rode it about a mile - too cold today. I hope to get out a bit more tomorrow and finish the break-in on Saturday or Sunday. Stay tuned for the ride report. Note: The EJK is still installed with the original numbers that were in it when I installed it. These numbers were supposed to work with the 283 kit and the stock muffler. My muffler has been de-catted, so it runs just a little freer than the stock muffler. I'll be attentive to the need for adjusting the EJK and report changes here and on the Tuning page. My initial reaction after 22 miles is "Don't you know it's gonna be alright". Two days of riding ahead for further data gathering. Time passes... Break-in is pretty much done for the under 5,500 RPM regime. I'll gradually work up to 8,500 RPM over the next 100 miles. I can't detect any vibration beyond what I felt with the stock engine. It seems as smooth and quiet as ever. The EJK 'jetting' seems spot on. The engine revs about as fast as it did before the 283 kit, given the 5,500 self-imposed limit. That is to say, reaction to twisting the throttle is about the same. However, I feel extra grunt from down low all the way up to feathering the throttle at 5.5K. The CRFL has a nice surge now, just what I was looking for. I don't expect to see more top-end performance - big bores don't work that way. But that's fine with me; I like low and mid better, anyway. I feel the CRFL is now a better bike for me than my WRR: * The modified CRFL engine beats the stock WRR engine; * The Race Tech rear shock is better than the WRR Go-Race mod; * The CRFL rides lower and is easier to 'flick' from side to side than the WRR (if you can imagine flicking a 300 pound moto); * I like the lower tail on the CRFL; it doesn't keep pushing me into the fuel tank like the stink-bug Yammie. I can't answer critics who may say I didn't do exactly the same mods to each bike. This is what I did, and this is the result. All-in-all, I'm very happy with the modified CRFL, and I'm only planning a few more mods to finish my work. One last comment about the 283 kit. I am extremely happy that Bill Blue decided to put this kit together. I know he's working on a bigger-bore kit (over 300cc), but this was the kit I wanted. I may some day try that larger displacement kit, but right now, 283cc is all I need. The kit is top-notch quality with a Wiseco piston, pin, and rings and quality gaskets. I had some minor problems installing the kit that would have been eliminated if I had removed the engine from the frame as Honda shows in the Service Manual. The added torque is exactly what I was looking for to make the CRFL perform up to what I need. I can't wait to ride the CRFL this spring/summer - everything is indeed alright! Now that I've 'hopped up' my ride, I've been thinking about the clutch. Reports from Thailand are not encouraging. I've decided to look into this further - see the Modifications page for details.
Sunday, May 19, 2013 update I've not had any problems whatsoever with the 283 kit so far. I've updated the intake to get a bit more response; see the Air Filter topic on the Mods page for details. The clutch is showing no signs of slipping, so the clutch update will be on hold for a while. I had lunch yesterday in Buena Vista with Bill Blue and he told me about some new developments on the horizon for the CRFL. I may have to pony up for what promises to be even more engine performance. Bill has 283 and 305 big bore kits available now, so get one while they're available. Alert - CBR300R news October 18, 2013: "Honda unveiled a freshened-up and bored-out CBR300R at the China International Motorcycle Trade Exhibition to fire back at Kawasaki's Ninja 300R." "Details on the 300 have surfaced in the form of a Chinese spec sheet (pictured). The motor has the same bore, but has been stroked 8 mm to 286 cc total displacement. Claimed horsepower jumps from 26 to 30.5 at the same 8500 rpm, while torque takes an even bigger jump (percentage-wise) from 17 to 20 foot/pounds." Further info here: Research |